
One of the latest evolutions in SEO is called schema markup. This new form of optimization is one of the most powerful, but least-utilized forms of SEO available today. Once you grasp the concept and method of schema markup, you can boost your website in the search engine result pages (SERPs).
Schema tells the search engines what your data means, not just what it says.
The content on your website gets indexed and returned in search results. Obviously. But with schema markup, some of that content gets indexed and returned in a different way.
How? Because the markup tells the search engine what that content means. For example, let’s say the word “DigiRanking” appears on an article. The search engine sees this, and produces a SERP entry with “DigiRanking” However, if I put the right schema markup around the name “DigiRanking” I’ve just told that search engine that “DigiRanking” is web development & SEO comapany, not just a couple random words. The search engine then provides results that display better information for the user who was searching for “DigiRanking.”
let’s understand how to use schema markup on your website.
Now, let’s talk about how to use schema markup. Your goal is to rank better, look better, and do better in the SERPs and in front of users.
Schema markup will help you. With your website in hand, follow these steps.
1. Go to Google’s Structured Data Markup Helper.

2. Select the type of data that you plan to markup.
There are several options listed. This list is not exhaustive. For the sample below, I’m going to use “Articles” since it’s one of the most common types of content.
3. Paste in the URL of the page or article that you want to markup.
If you only have HTML, you can paste that instead. Then, click “Start Tagging.”

The page will load in the markup tool, and provide you with the workspace for the next phase of markup — tagging items. You’ll see your web page in the left pane, and the data items in the right pane.

4. Highlight and select the type of elements to be marked up.
Since this piece of content is an article, I’m going to highlight the name of the article in order to add “Name” markup. When I finish highlighting, I select “Name” from the tool tip.

When I select “Name,” the tool adds it to “Data Items” in the right pane.

5. Continue adding markup items.
Use the list of data items as a guide, and highlight the other items in your article to add them to the markup list. You probably won’t be able to tag every item in the list. Just add what you can.
6. Create the HTML.
Once you’ve finished, click “Create HTML.”

In the following page, you will see the HTML of your page with the relevant microdata inserted in the spots that you selected.

7. Add schema markup to your web page.
Next, you will go into your CMS (or source code if you’re not using a CMS) and add the highlighted snippets in the appropriate spots. Find the yellow markers on the scrollbar to find the schema markup code.

A simple alternative is to download the automatically-generated HTML file, and copy/paste it into your CMS or source code.

When you click “Finish,” you will be presented with a series of “Next Steps.”

8. Use the Structured Data Testing Tool to find out what your page will look like with the added markup.
Instead of analyzing a published web page, I’m going to analyze the code that the tool generated for me, and which I downloaded.

Once the code is pasted, I click “preview.” The testing tool shows me what the article will look like in Google search results:
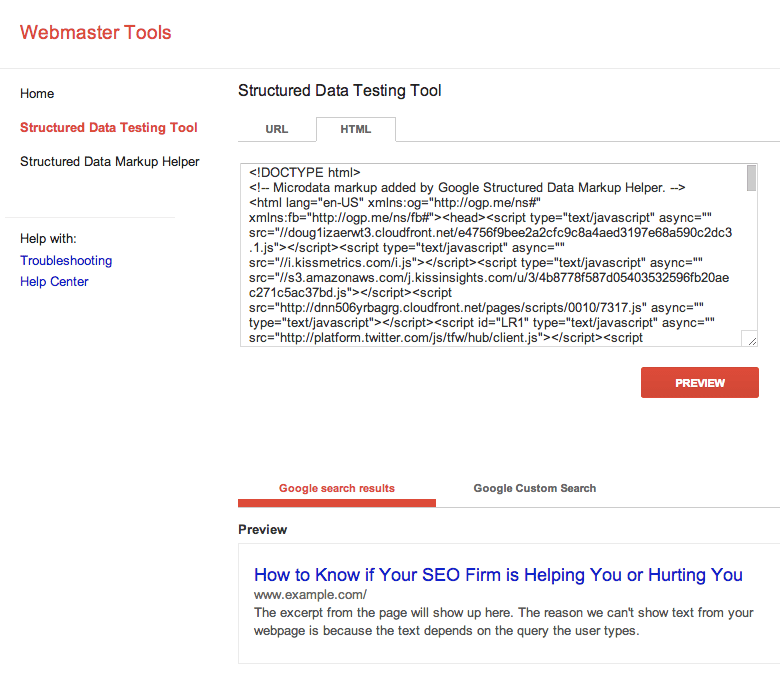
In addition, I can inspect every markup element that I added.

If necessary, I can edit the HTML directly in the testing tool in order to update the schema and preview results again.